Generate Reports
When the surveying period of the event is over, reports will need to be generated for the participants. Client Admins will need to generate the data, populate and release them to the participant & participants manager or HRBP.
Step 1. Generate Data
Generating data takes the information from the survey responses and prepares it for the reports.
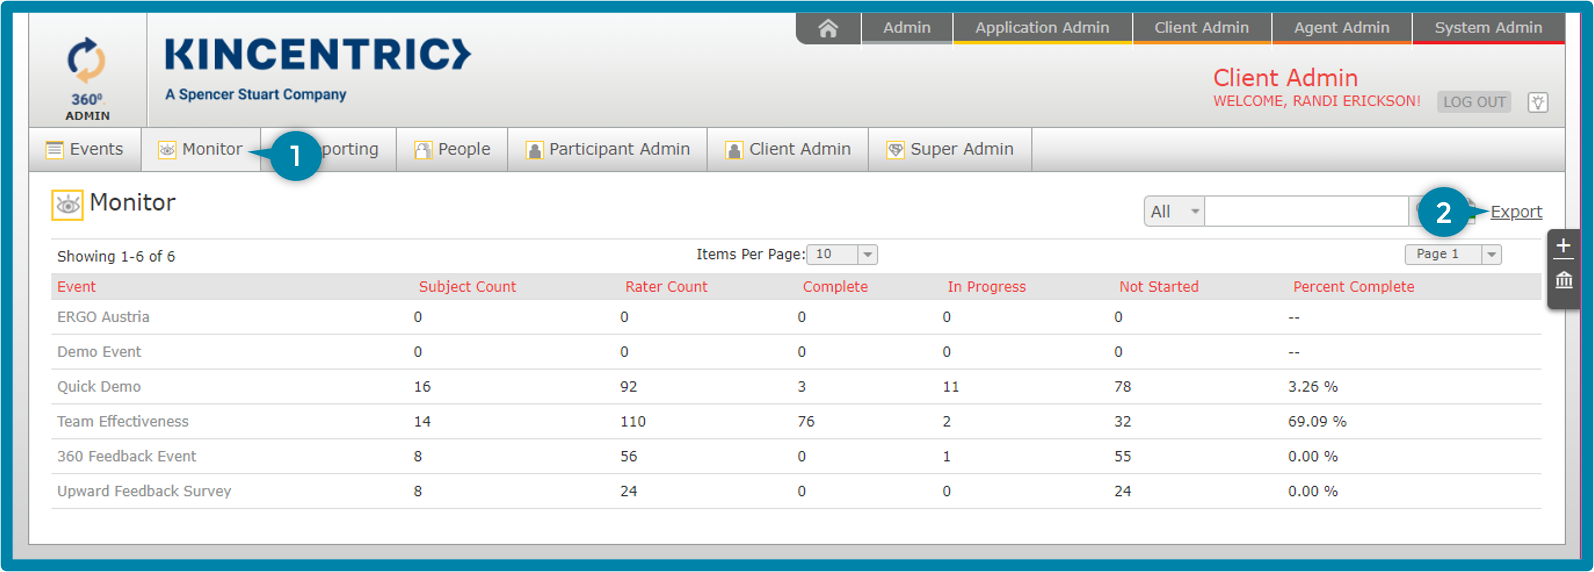
- Click Reporting from the navigation menu
- Click Event Reporting from the navigation menu.
- Under Report Data, click the Generate Datacircle icon
- The Generate Date reflects last date the generate data was run.
- New responses will reflect the number of new survey responses since the last generation date. This is helpful if you've opened the survey back up for raters to finish surveys or want to generate reports in batches.
- When the data is finished populating, you will receive a popup message stating the report data has been generated. Click OK
- Click Refresh under Generate Data
Step 2. Generate Reports
Once the data has been generated, it will be used to create the reports.
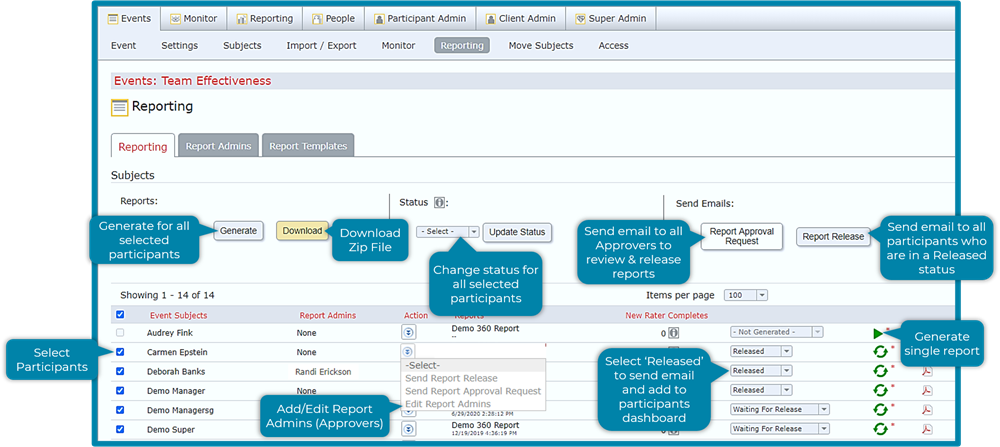
- You will see a list of all the participants, by default everyone is checked and will receive a report.
- Uncheck any participants you do not want to generate a report for at this time. Example: One person had low participation and you want to open the survey for a couple days so the raters can finish.
There are two options to generating the report:
- All Selected Participants: Click the Generate button to create the reports for all the checked participants. The system will take several minutes to process this request; you will receive a confirmation with the number of reports created.
- Specific Participants: If you want to generate a report for just one individual, click the Green Arrow.
Tip!
- Download a Zip file: Click Download to create a zip file of all the checked participants reports. Doing this does not affect the status of the report and provides you a copy of all the reports.
What happens next
This will depend on how your approvals were set up by your Event Admin;
- No Approvals Required: If your event does not require report approvals, the Status will reflect 'Released' next to the employee. The report has been sent to the Participants Dashboard and is viewable to them.
- Click Report Release under 'Send Emails' to notify all the participants that the reports are now available.
- To send the notification to just one participant at a time, click the Email Icon next to their name under 'Send Report Release'.
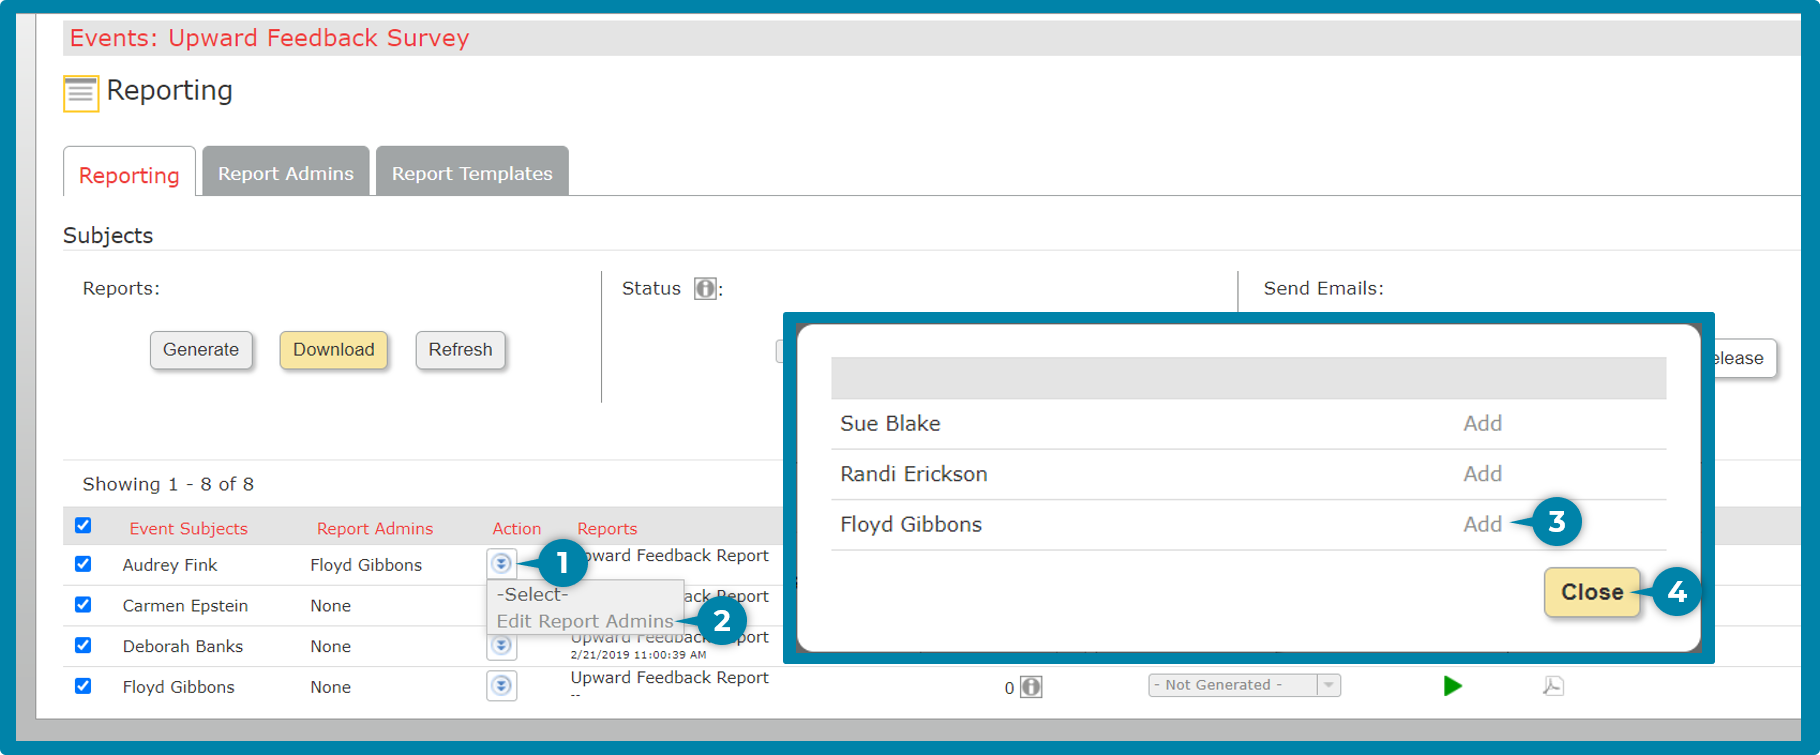
- Release the report to participant's coach or leader.
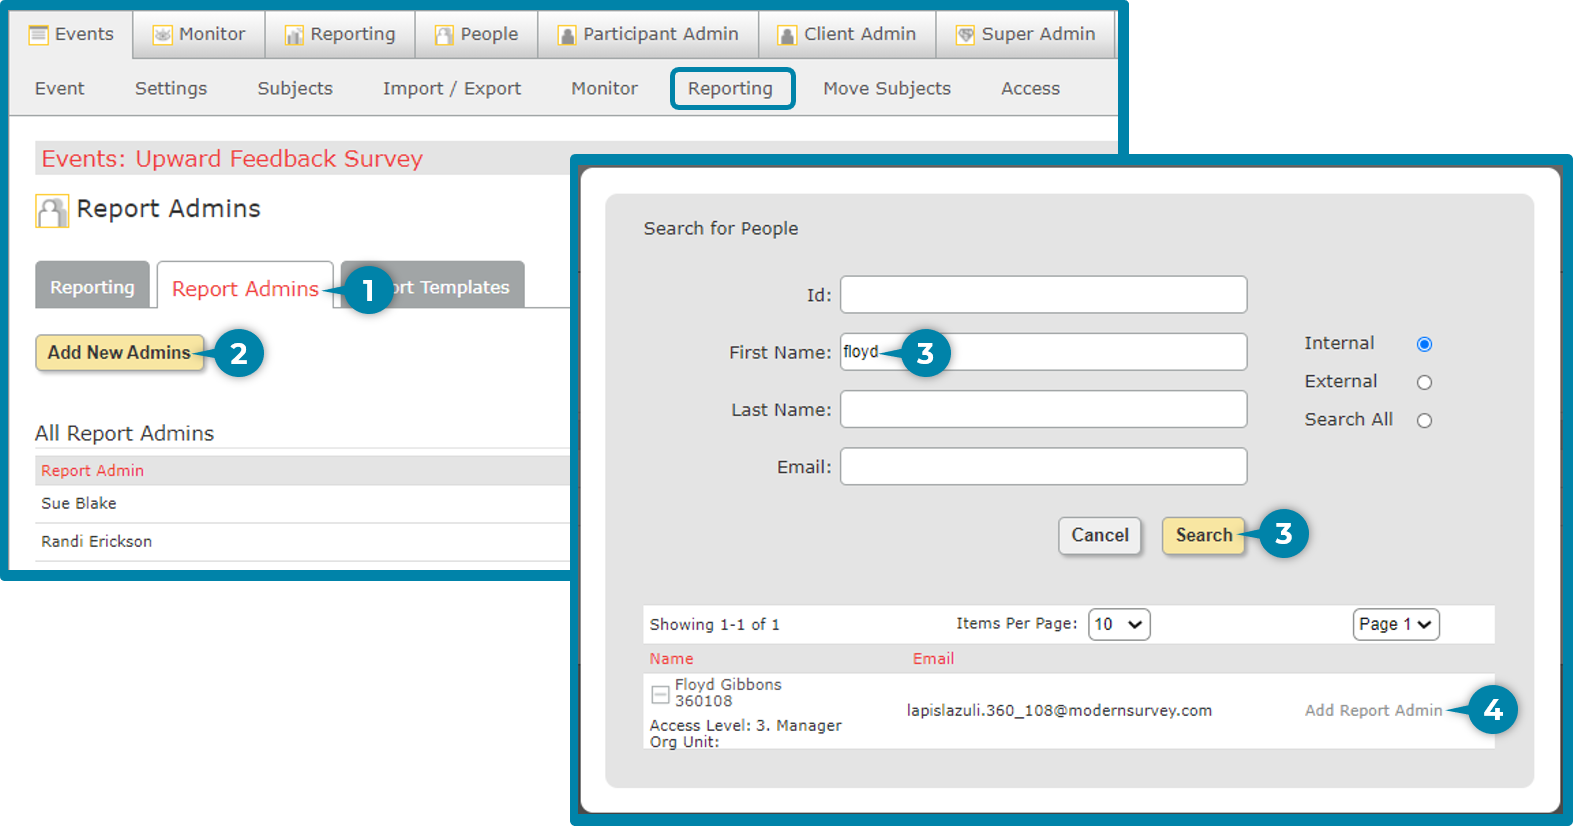
- Add the coach/leader as a Report Admin
- Click the Report Admins tab
- Click: Add New Admins
- Enter the Name of the coach/leader and click Search
- Click the Add Report Admin link
- Click the Reporting tab to return to the Reports page
- Add the coach/leader as a Report Admin to the participant. Once the coach/leader is added, the report will appear in their dashboard for them to download and release.
- Click the Down Arrow Icon in the Action column
- Select Edit Report Admins
- Click Add for the coach/leader
- Click the Close button
- Send a notification to the coach/leader letting them know they have reports to review and release.
- Check the Box next to the participant's name
- Click the Report Approval Request button at the top right of the page in the Send Emails section.
- An email will be sent to the coach/leader for all participants that you checked.
Event Subject Icons
- Green Arrow: The report has not been generated. Click this icon to generate the report for one individual or click the Reports: Generate button to run reports for all checked participants. The Adobe icon will be gray.
- Generate: The Report has been generated and is ready. The Adobe icon has color. Click the icon to view the report.
- Dark Email icon means you can send the participant an email or will get an email when the Send Emails Report Approval or Report Release is clicked.
- Light Email icon is represented when a user is not applicable to receive a Send Report Approval email.